|
|
Tools
Gather up the basics - soft
carpenters pencil. 10 foot tape measure and a
right angle square. You will also need a sharp
hand saw, 2” or better block plane with a
NEW blade, a power planer with a 3” or
better sharp blade, 40 grit sandpaper (spray
mount to 4”x14”x3/4” block of wood)
100 grit and 320 grit sandpapers and another
sanding block 4’’x12’’x3/4
Specialty tool you can make: a “rail gage”
made from a piece of right angle pine molding (1’
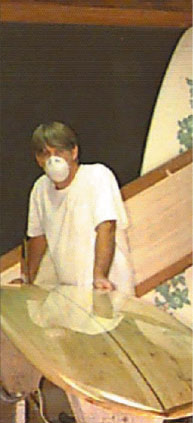
and 3/4” sides), 3” long. Safety Note
get a good dust and fumes face mask and wear eye
protection. Balsa dust is super fine and will
rake havoc if it gets into your lungs and eyes.
If you don’t have a set of shaping blocks I’ll
send you a free plan sheet. And some suppliers
carry ready made blocks.
Templates

Get your hands on a board you like and trace half
of the outline (nose to tail) on a piece of heavy
paper or cardboard. That’s the easy way - or
" e " mail me and I’ll send ya’
the free sheet on templates.
Selecting
the blank
Decide the finish measurements of your board.
Consider rocker, nose and tail width as well as
center width and thickness first, then contact
your local balsa blank supplier, I can help.
Check the blanks for consistency and color ,
grain, worm holes and any other characteristics
that effect the appearance of a finished piece.
Personally, I prefer natural " blemishes
" and imperfections in the blanks I use.
Choosing
the outline
Classic long board outlines vary between somewhat
parallel looking rails to almost a teardrop shape.
(Here is where YOUR style of riding and
personality are priority). Various issues of Long
Board and Surfer magazines offer explanations on
theory and designing of rails, rockers, weight,
mass and other high-tech. stuff. I’ve got
another free sheet of my own “revelations”
harvested over thirty years - if you’re
interested email me.
Layout
Lay your blank on the blocks bottom up, measure
the length, mark the CENTER nose to tail and
width. If you like more weight foreword, mark the
center between 3 and 6 inches closer to the nose.
Now, from this center point measure out to the
rail one half of the final width, (use the square
against one of the laminate lines near or at the
center point), mark the width and then add 1/8”.
Push a 1” finishing nail into the board at
this final point. Repeat the process for the
width at the other rail and tail and nose widths.
Position the template against the nails and trace
the outline.
Rough
out
Find your hand saw, (use a “saws-all”
if you are in a hurry or are sadly out of shape)
PUT ON YOUR MASK and EYE PROTECTION and remove
the excess wood from the outline. Try keeping the
cut true and at right angles with the blank. Stay
outside the last 1/8” line as this is a
rough cut and a little extra wood will help in
the truing stage.
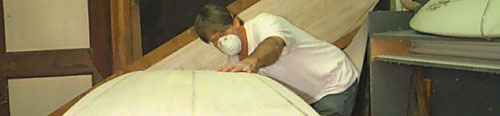
Truing
and plan check
With a block plane, or if you are confident with
your power planer, true up the curve of the rails
by placing the blank on edge in the blocks, Make
long, deliberate strokes while watching the
template outline. Nose and tail curves are easily
worked down with the 40 grit sanding block or
power grinder. Do both rails, nose and tail then
rough sand with the 40 block to make sure the
rails are at 90 degrees to the bottom, Grab the
template and check the outline. Looking’
good? Stand the board up, step back and check it
out. Look for symmetry in the outline and mark
any glaring imperfections - True up.
Adjust
rocker
Place a straight piece of wood, (1”x3”
x 8’ will do) on the bottom of the board, (nose
to tail). Have a friend measure the distance from
the bottom of the wood to the nose. If you are
happy with the nose rocker - leave it, if not you
can add more by first marking the amount to
remove at the tip of the nose thickness. Tail
rocker can be added using the same method. Keep
in mind that any changes you make to the nose and
tail will and must affect the whole board. Remove
material with the block or power plane. Start at
18” back from the nose / tail and with
smooth strokes gradually taper a curve down to
the nose and tail marks. Count the passes as you
go. Think Symmetry. Before we go on, check this -
Without sounding too stupid, let’s remember
that (DUH !) water flows over all parts of the
board. It must flow SMOOTHLY over the surfaces of
the board. Intentional obstructions like fins,
channels, concaves and rocker allow the rider to
control the speed and make those award winning
moves. On the other hand, too much kick in the
nose will slow the board, uneven contours and
inconsistent transitions hinder performance and,
lets face it, they just plain look bad. The
bottom must flow smooth and evenly from nose to
tail. Concave, at V and rounded areas must have
smooth transitions one to another. While working
the bottom and all other parts of the board, it
helps me to imagine the tool I’m using as if
it is water passing over the surface of the board.
I then feel the imperfect transitions and smooth
them out.
Bottom
I like to keep the bottom classic, simple and non
- trendy. The time tested shaping elements still
work. Try to keep things easy, work with the
natural rocker you bought with the blank, add a
slight “vee” to the nose and tail, Get
the center section as flat as possible. (Some
classic bottoms are slightly rounded. This causes
the side - to - side action to be a bit
squirrelly). Remember to smooth out the nose and
tail transitions where they meet the center. Use
the block or power plane, work WITH the grain.
Notice and enjoy the variations in balsa’s
color and texture.
Top
Balsa, unlike foam, is somewhat hard all the way
through so you can plane down from the top to
reach the thickness you want. Keep the deck flat
or roll the outsides slightly to the rails.
Simply, it’s a matter of thinning and
smoothing. Watch all the elements of contour and
again, keep the transitions smooth. This is still
a rough stage so don’t sweat perfection…
yet.
Rails
Now the fun Begins. Most classic boards I’ve
held feature rails that seem symmetrical - top
and bottom. Commonly called “50/50”
rails, the cross section is a smooth ellipse -
tapering the full length of the rail - nose to
tail. However, Modern rail design features like a
sharper bottom curve rolling off to a hard edge
about 18” from the tail and the addition of
a narrow chine on the undermost turn of the rails
will produce faster response in turns and more
speed. The choice is yours. For classic 50/50
rails: pencil a line at the center of the
thickness of the rails. Now scribe two more
lines, one 1- 3/4 " and another at 3”
in from the edge of the rail on the top of the
board. Turn the board over and scribe two more
lines on the bottom, one 1 - 3/4” in and the
other 2 - 1/2” in from the bottom edge of
the rail. (These numbers will yield a slightly
rounded bottom and a more rounded top). Scribe
another line half-way between the center line and
the top of the rail and yet another half-way
between the center line and the bottom of the
rail. Take a break and check things out. The
lines you have made will become the edges or
corners of “facets” as you “square
off” the rails. (Some of the lines will
disappear as they approach the nose and tail.)
Begin removing material from the rails from the
top by holding your plane at 45 degrees to the
edge of the rail near the center of the board.
Remove wood until the area meets the first lines
on the side and top. Now you have created two
more edges. Extend these edges to the entire
length of the rail. Repeat ALL the other edges
the same. When you are finished , the board will
look like a stealth fighter with all its squared
- off edges that you can now work down with more
hand finishing and rough sanding. For more
contemporary rails: Make two lines on the outside
of the rails - one 1/2” up from the bottom,
the other 1 - 1/4” down from the top. Turn
the board over and plane the inside bottom edge
at 35 to 45 degrees until the at area you are
making is 3/8” wide from nose to 18” or
so before the tail. When the edges are rounded
from these numbers and the tail section bottom is
left sharp, (round the rails from the deck to the
bottom), the rails will be close to “60 - 40”
with a slight chine on the very bottom. (Leave
the last 18” sharp [hard] at the tail).
Rough
sanding
Is your mask on? For me this is the worst part.
The dust is everywhere! The upside is the great
workout you are about to experience. It will help
on that next surfing session. Grab that 40 grit
and go for it! Use the block on the at areas and
rails with long, deliberate strokes, always with
the grain. Round off and smooth the transitions,
eliminate plane marks.
Nose-
tail blocks and Fillers
Some foam suppliers furnish blocks that are
already glued up. The balsa sources I use do the
same. However, if you are looking for something
out of the ordinary, you might need to special
order or glue up some yourself. Remember, dry non-oily
hardwoods are more compatible with the resins
used in laminating the board. Lay out the pieces
on the nose and tail and choose the angles you
are to cut from the board. Match the angles to
the blocks and cut. Be sure to leave an inch or
so extra on the rail end to trim off and match in
the final sanding stage. Glue up using a hot
batch of resin. Use masking tape to hold the
blocks firmly to the board. Fill any offensive
holes with a mixture of carpenters’ glue and
sanding dust from the boards or its scrap pieces.
Or use clear resin if you prefer but be specific
while applying the “ filler” as all the
excess will need to be sanded off later. Now
clean up and walk away! Let the resin and glue
cure - ‘til tomorrow.
Final
shaping and sanding
Begin this first part of the final stage by
trimming off the excess wood from the nose and
tail blocks with a hand saw. Carefully plane down
the excess wood then feather into the rails with
the 40 grit sanding block while restoring the
original contours to the nose and tail. Now,
carefully sand any excess filler from the
repaired spots with 100 grit block. Use the same
block on the next phase to contour and smooth out
scratches from the rest of the board. (for modern
rails) Sharpen the bottom tail section and
eliminate any facets from the curve of the rails.
Keep the bottom most edge of the chine that runs
from the tail section almost to the nose. Now
smooth the rails by hand concentrating on the
upper and middle curves. Use 100 grit or better
sheet paper. If you want a great finish, lightly
sand the entire board with 320. This will reveal
any missed scratches to be removed and also bring
out the character of the grain. Don’t over
sand. Concentrate on keeping the grain at - over
sanding will cause ‘‘ripples”.
Fin
or fin box
Your choice. Classic glass - on skegs are
available in somewhat limited selection. Some
suppliers offer n blanks that you can finish
yourself. Ask around or make your own! A modern
fin box will give you more options in fins and
fin positioning. Let a pro glassier install it.
Glassing
Balsa wood does not yield to pressure like foam
does. I recommend one layer of 6 or 4 oz. glass
over the entire board. this application keeps the
weight down and is more than sufficient to seal
the board. As far as the actual glassing (laminating)
goes - LET A PROFESSIONAL GLASS SHOP DO IT……
they have all the know-how and equipment. (I know
a few great laminators if you need help locating
one.) Just tell ‘em you want it “REAL
GLOSSY” and they‘ll know what to do. |
Wallace Surfboards
|
|